图片,向量,相机,背景

输出一张图片

当说到渲染的时候,我们最后会得到一张图片,而一种较为简单的图片格式是 PPM

上面是一个 PPM 格式的图片的例子。

#include <iostream>

int main() {
// Image
const int imageWidth = 256;
const int imageHeight = 256;

// Render
std::cout << "P3\n" << imageWidth << ' ' << imageHeight << "\n255\n";

for (int j = imageHeight - 1; j >= 0; --j) {
for (int i = 0; i < imageWidth; ++i) {
auto r = double(i) / (imageWidth - 1);
auto g = double(j) / (imageHeight - 1);
auto b = 0.25;

int ir = static_cast<int>(255.999 * r);
int ig = static_cast<int>(255.999 * g);
int ib = static_cast<int>(255.999 * b);

std::cout << ir << ' ' << ig << ' ' << ib << '\n';
}
}
}

编译并执行。

> g++ -std=c++11 main.cpp -o main
> ./main > image.ppm

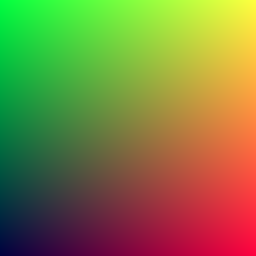
最后得到一张渐变图片。

向量

基础向量类,下面定义了一个三维向量 vec3,对于空间中的点或者 RGB 颜色来说,都可以使用这个类。

// vec3.h
#ifndef VEC3_H
#define VEC3_H

#include <cmath>
#include <iostream>

using std::sqrt;

class Vec3 {

public:
double e[3];

public:
Vec3(): e{0, 0, 0} {}
Vec3(double e0, double e1, double e2) : e{e0, e1, e2} {}

double x() const { return e[0]; }
double y() const { return e[1]; }
double z() const { return e[2]; }

Vec3 operator-() const { return Vec3(-e[0], -e[1], -e[2]); }
double operator[](int i) const { return e[i]; }
double& operator[](int i) { return e[i]; }

Vec3& operator+=(const Vec3 &v) {
e[0] += v.e[0];
e[1] += v.e[1];
e[2] += v.e[2];
return *this;
}

Vec3& operator*=(const double t) {
e[0] *= t;
e[1] *= t;
e[2] *= t;
return *this;
}

Vec3& operator/=(const double t) {
return *this *= 1/t;
}

double length() const {
return sqrt(lengthSquared());
}

double lengthSquared() const {
return e[0]*e[0] + e[1]*e[1] + e[2]*e[2];
}
};

// type alias for Vec3
using Point3 = Vec3;
using Color = Vec3;

// Vec3 utility functions
inline std::ostream& operator<<(std::ostream &out, const Vec3 &v) {
return out << "Vec3(" << v.e[0] << ", " << v.e[1] << ", " << v.e[2] << ")";
}

inline Vec3 operator+(const Vec3 &u, const Vec3 &v) {
return Vec3(u.e[0] + v.e[0], u.e[1] + v.e[1], u.e[2] + v.e[2]);
}

inline Vec3 operator-(const Vec3 &u, const Vec3 &v) {
return Vec3(u.e[0] - v.e[0], u.e[1] - v.e[1], u.e[2] - v.e[2]);
}

inline Vec3 operator*(const Vec3 &u, const Vec3 &v) {
return Vec3(u.e[0] * v.e[0], u.e[1] * v.e[1], u.e[2] * v.e[2]);
}

inline Vec3 operator*(double t, const Vec3 &v) {
return Vec3(t*v.e[0], t*v.e[1], t*v.e[2]);
}

inline Vec3 operator*(const Vec3 &v, double t) {
return t * v;
}

inline Vec3 operator/(Vec3 v, double t) {
return (1/t) * v;
}

inline double dot(const Vec3 &u, const Vec3 &v) {
return u.e[0] * v.e[0]
+ u.e[1] * v.e[1]
+ u.e[2] * v.e[2];
}

inline Vec3 cross(const Vec3 &u, const Vec3 &v) {
return Vec3(
u.e[1] * v.e[2] - u.e[2] * v.e[1],
u.e[2] * v.e[0] - u.e[0] * v.e[2],
u.e[0] * v.e[1] - u.e[1] * v.e[0]
);
}

inline Vec3 unitVector(const Vec3 &v) {
return v / v.length();
}

#endif

光线

光线,实际上是一条射线,满足方程 \(\textbf{P}(t) = \textbf{p} + t\textbf{d}\),其中 \(\textbf{p}\) 是空间中的一点,光线发射出来的原点,\(\textbf{d}\) 则为射线的方向向量。

下面是光线的基本定义。

// ray.h
#ifndef RAY_H
#define RAY_H

#include "vec3.h"

class Ray {

public:
Point3 o; // origin of the ray
Vec3 dir; // direction of the ray

public:
Ray() {}
Ray(const Point3& origin, const Vec3& direction)
: o(origin), dir(direction) {}

Point3 origin() const { return o; }
Vec3 direction() const { return dir; }

Point3 at(double t) const {
return o + t*dir;
}
};

#endif

相机

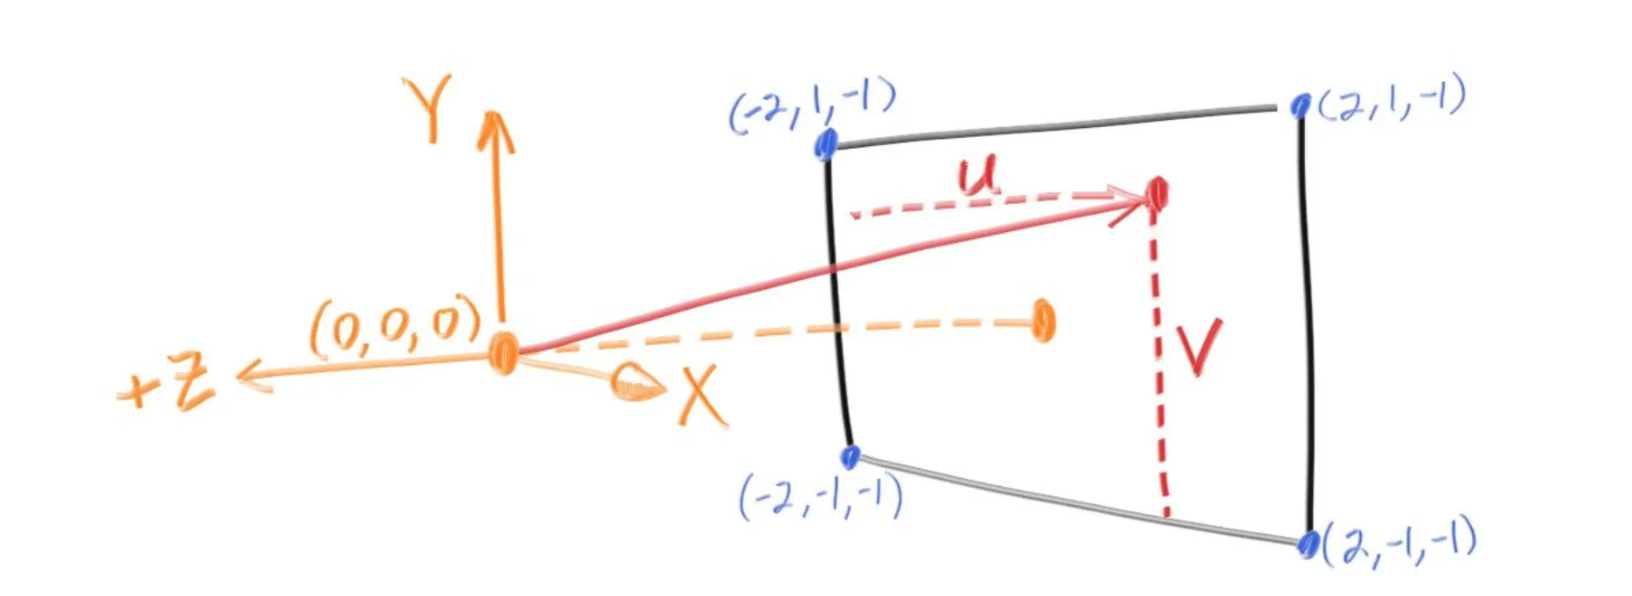
光线追踪简单来说分成下面三个步骤

  1. 计算从眼睛到像素的光线
  2. 计算光线与场景的什么物体相交
  3. 计算交点的颜色

照相机与投影平面关系如下所示

下面的代码渲染一个渐变的背景。注意 Camera 部分的计算。

#include <iostream>

#include "color.h"
#include "ray.h"
#include "vec3.h"

Color rayColor(const Ray& r) {
Vec3 unitDirection = unitVector(r.direction());
auto t = 0.5 * (unitDirection.y() + 1.0);
return (1.0-t) * Color(1.0, 1.0, 1.0) + t*Color(0.5, 0.7, 1.0);
}

int main() {
// Image
const auto aspectRatio = 16.0 /9.0;
const int imageWidth = 400;
const int imageHeight = static_cast<int>(imageWidth / aspectRatio);

// Camera
auto viewportHeight = 2.0;
auto viewportWidth = aspectRatio * viewportHeight;
auto focalLength = 1.0;

auto origin = Point3(0, 0, 0);
auto horizontal = Vec3(viewportWidth, 0, 0);
auto vertical = Vec3(0, viewportHeight, 0);
auto lowerLeftCorner = origin - horizontal/2 - vertical/2 - Vec3(0, 0, focalLength);

// Render
std::cout << "P3\n" << imageWidth << ' ' << imageHeight << "\n255\n";

for (int j = imageHeight - 1; j >= 0; --j) {
std::cerr << "\rScanlines remaining: " << j << ' ' << std::flush;
for (int i = 0; i < imageWidth; ++i) {
auto u = double(i) / (imageWidth - 1);
auto v = double(j) / (imageHeight - 1);
Ray r(origin, lowerLeftCorner + u*horizontal + v*vertical - origin);
Color pixelColor = rayColor(r);
writeColor(std::cout, pixelColor);
}
}

std::cerr << "\nDone.\n";
}

输出如下所示。